How to Integrate WordPress and Doodstream With WPDoods
How to Integrate WordPress and Doodstream With WPDoods – To integrate WordPress and Doodstream with WPDoods, start by ensuring your site meets the plugin’s tech requirements.
Then, download the WPDoods plugin from ZeroByteCode, purchasing a licence key to activate it. After installing the plugin on your WordPress site, you can configure the plugin settings with your Doodstream API key.
You’ll then be set up to manage your video content directly from your dashboard; with the ability to create posts, upload videos, customize dimensions, and monitor accounts seamlessly.
Highlights
Hide- Download and install the WPDoods plugin from ZeroByteCode's official website on your WordPress site.
- Purchase a license key from ZeroByteCode to activate the WPDoods plugin.
- Input your Doodstream API key in the WPDoods settings for integration.
- Use the remote upload feature in WPDoods to upload videos directly from your WordPress dashboard to Doodstream.
- Create WordPress posts automatically using the Doodstream video ID or URL through WPDoods.
Stick around if you’re interested in maximizing these features for effective integration.
Introduction to Integrating WordPress with Doodstream Using WPDoods
While managing video content on your WordPress site can often seem complex, integrating Doodstream using the WPDoods plugin simplifies this process by allowing direct video uploads, easy embedding, and automated post creation.
This powerful tool connects your WordPress site with Doodstream, a popular video hosting service. With WPDoods, you can fetch video data using the Doodstream Official API, create WordPress posts using this data, and effortlessly manage post title, content, permalink, and featured image.
You’ll appreciate the remote upload feature allowing you to directly upload videos to your Doodstream account from your WP Dashboard. You simply enter the remote video URL, and WPDoods handles the rest. Once uploaded, you receive the video ID necessary to create a video post.
Moreover, WPDoods provides access to your Doodstream account info right from the WordPress interface, including your registered email address, storage status, and account balance.
Plus, you can use dynamic shortcodes to embed the fetched video into your WordPress video post, ensuring a responsive viewing experience across all platforms, browsers, and devices.
Harness the power of WPDoods to streamline your video content management and elevate your WordPress site.
Getting Started with WPDoods
Starting off with ‘Getting Started with WPDoods‘, it’s essential to understand the prerequisites for installation.
After addressing these, you’ll move on to downloading the WPDoods plugin. We have compiled the things you need to get started, which you can find here:
Getting Started
Table of Contents Introduction to Integrating WordPress with Doodstream Using WPDoods Getting ... Read More
Once that’s accomplished, you’re ready to install WPDoods on your WordPress site, setting the stage for a seamless integration with Doodstream.
Requirements for Installation
Before you start the process of integrating WordPress and Doodstream using WPDoods, make sure you meet the necessary technical requirements such as having WordPress version 6.4 and PHP version 7.4 at the minimum, and configuring specific settings on your Doodstream account.
In addition, you’ll need to have an active Doodstream account with the capability to fetch video data via the Doodstream Official API. This necessitates you to have the correct API credentials, which you can obtain from your Doodstream account settings.
Furthermore, verify that your server environment meets the minimum requirements, with a server running Apache or NGINX and the mod_rewrite Apache module enabled. The PHP memory limit should be increased to at least 128MB, and the max_execution_time in your php.ini file should be set to 300 or higher.
Also read: How to Build a Japanese AV Website Using WordPress and WPJav
Completing these prerequisites will save you potential headaches down the line and ensure a smooth installation process.
Purchasing and Downloading the WPDoods Plugin
Having confirmed that your technical environment is ready, let’s proceed to obtaining the WPDoods plugin from the ZeroByteCode official website.
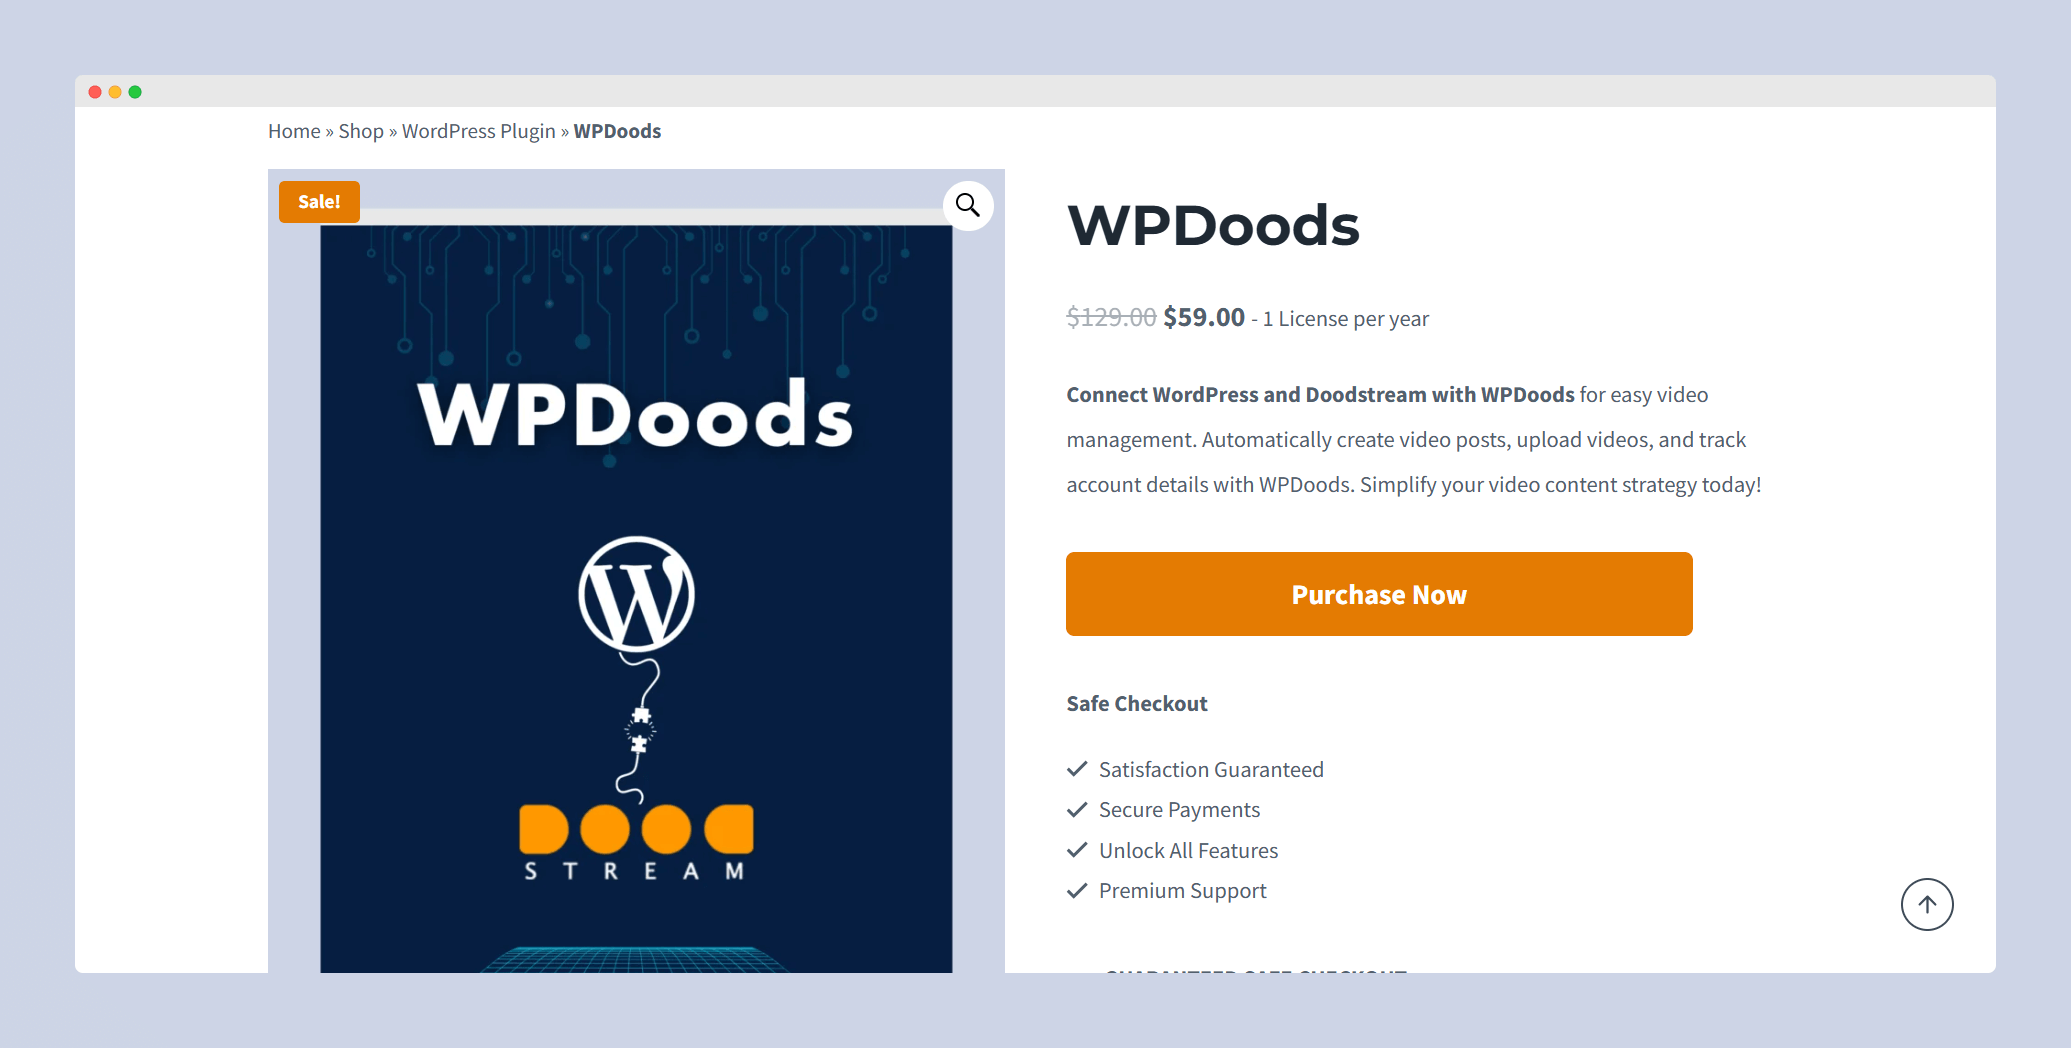
Navigate to ZeroByteCode’s official website then navigate to the WPDoods landing page, explore our current offerings and locate the WPDoods plugin. This is a premium plugin, offered with premium license.
WPDoods
Connect WordPress and Doodstream with WPDoods for easy video management. Automatically create video ... Read More
After your purchase, you’ll receive a confirmation email with your unique license key. This key is essential for the activation and proper function of the plugin. In addition, you’ll receive a link to download the plugin. Click on it and a .zip file will start downloading.
This .zip file is the plugin package, containing all the necessary files for the integration of WordPress and Doodstream. Be sure to keep it safe and intact. You’ll need it in the upcoming installation process.
Also, remember, you’re not just buying a plugin, you’re investing in a tool to streamline your WordPress-Doodstream integration, making your content generation process more efficient.
Installing WPDoods on Your WordPress Site
Now that you’ve downloaded the WPDoods plugin, it’s time to proceed with the installation process on your WordPress site. Start by logging into your WordPress admin panel. Locate ‘Plugins‘ on the left-hand panel, then select ‘Add New‘. Click ‘Upload Plugin‘ at the top of the page.
Locate your downloaded WPDoods zip file, then click ‘Install Now’. WordPress will automatically complete the installation. Once done, click ‘Activate Plugin‘. You’ve successfully installed WPDoods on your WordPress site!
Next, let’s configure the plugin. Navigate to the WPDoods settings in your WordPress dashboard. Here, you’ll need to input your Doodstream API key. You can find this key in your Doodstream account under ‘Settings’ then ‘API’. Copy the API key, paste it into the corresponding field in WPDoods settings, and save changes.
At times, you may encounter issues during installation. Don’t fret, it’s usually due to incompatible WordPress or PHP versions. WPDoods requires WordPress 6.4 or newer, and PHP 7.4 or newer. Update your versions if needed.
Lastly, validate your set up by creating a test post using WPDoods. If the post publishes correctly, congratulations! You’re all set to start integrating Doodstream videos into your WordPress site with WPDoods.
Setting Up WPDoods for Optimal Use
Now that you’ve installed WPDoods, it’s important to set it up correctly for the best user experience.
The first step is configuring it with your Doodstream API Key, which will link your WordPress site to your Doodstream account.
After that, you’ll want to customize your settings for managing your videos, ensuring your content is organized and displayed exactly how you want it.
Configuring WPDoods with Your Doodstream API Key
To enhance the integration of WordPress and Doodstream using WPDoods, it’s essential to configure the plugin with your Doodstream API key.
First, you’ll need to locate your API key within your Doodstream account.
After obtaining the key, you can then input this information into the designated area within the WPDoods plugin settings on your WordPress dashboard.
Locating Your API Key
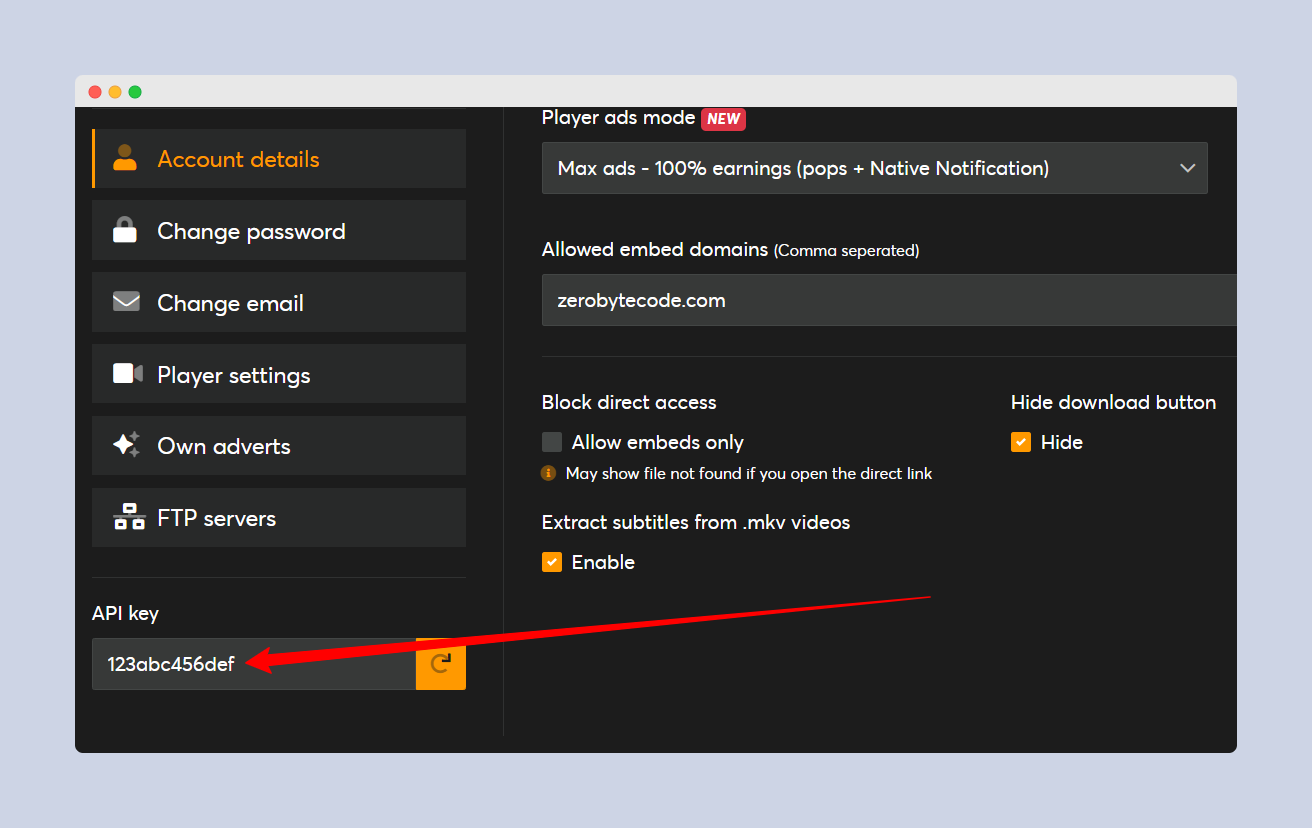
Before diving into the configuration of WPDoods with your Doodstream account, it’s important to locate your Doodstream API key within your account settings.
Log into Doodstream and navigate to your account settings. From there, select the API section.
Here, you’ll find your unique API key, an essential component for integrating Doodstream with WPDoods. Safeguard it, as it links your website to your Doodstream account.
Entering API Information in WPDoods
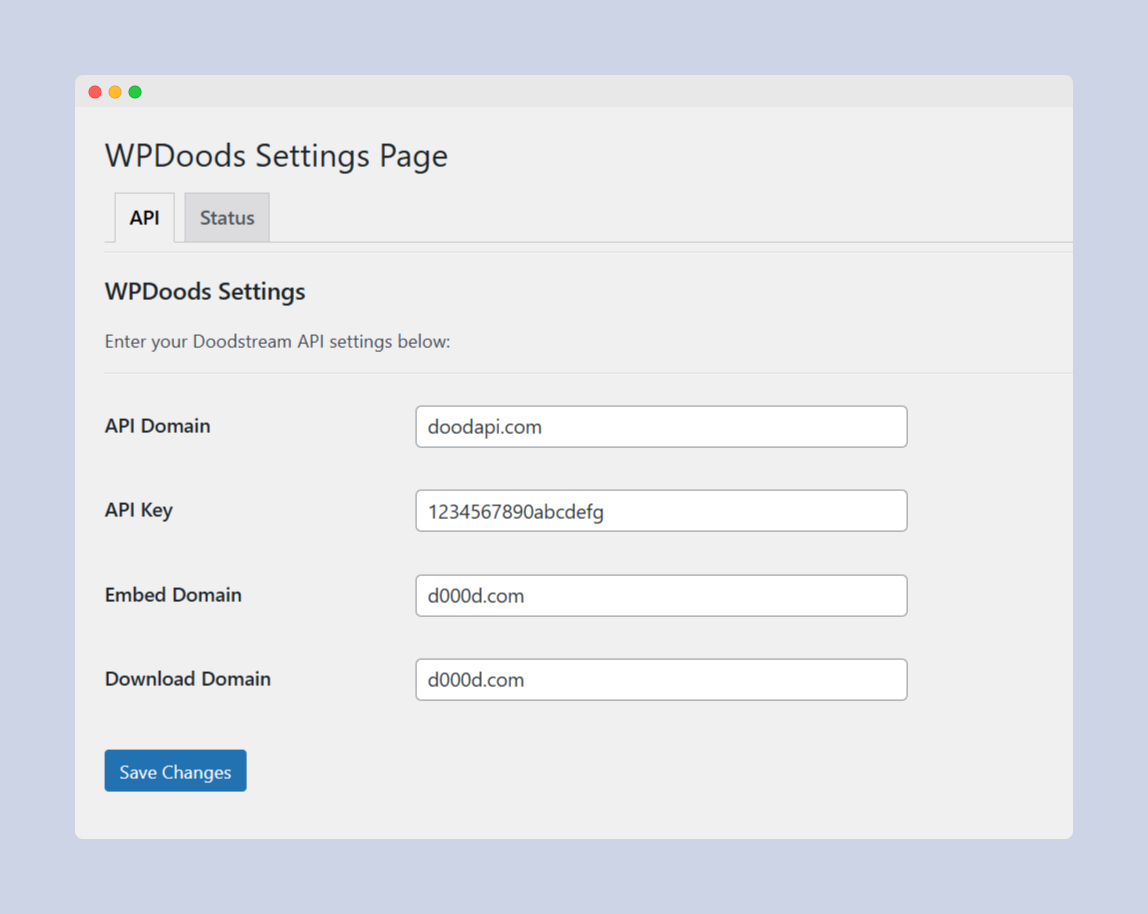
Once you’ve located your unique Doodstream API key, it’s crucial to correctly input this information into WPDoods to ensure the best functionality of the plugin. Follow these steps:
- Navigate to the WPDoods plugin settings
- Locate the ‘API Key’ field
- Copy your Doodstream API key
- Paste the key into the ‘API Key’ field
- Click ‘Save Changes’
For complete information, you can read our documentation below:
Configure WPDoods
Now you already installed WPDoods and an API key, it’s time to start configuring the WPDoods ... Read More
Customizing Settings for WordPress-Doodstream Integration
Browsing through WPDoods’ customizable settings, you’ll find an array of options designed to enhance your video management process, such as Embed Domain, and Download Domain, all of which greatly impact your workflow and the presentation of your content.
Utilizing WPDoods to Manage Video Content
Moreover, with WPDoods, you can efficiently manage your video content through WordPress by harnessing its automatic post creation and remote upload features.
By simply inputting a Doodstream video ID or URL, the plugin will fetch the necessary data and formulate a new WordPress post, handling elements such as the title, content, and permalink.
Additionally, the plugin allows you to upload videos directly to Doodstream from your WordPress dashboard, streamlining the process and saving you the trouble of manually uploading each video.
Creating Posts Automatically from Doodstream Videos
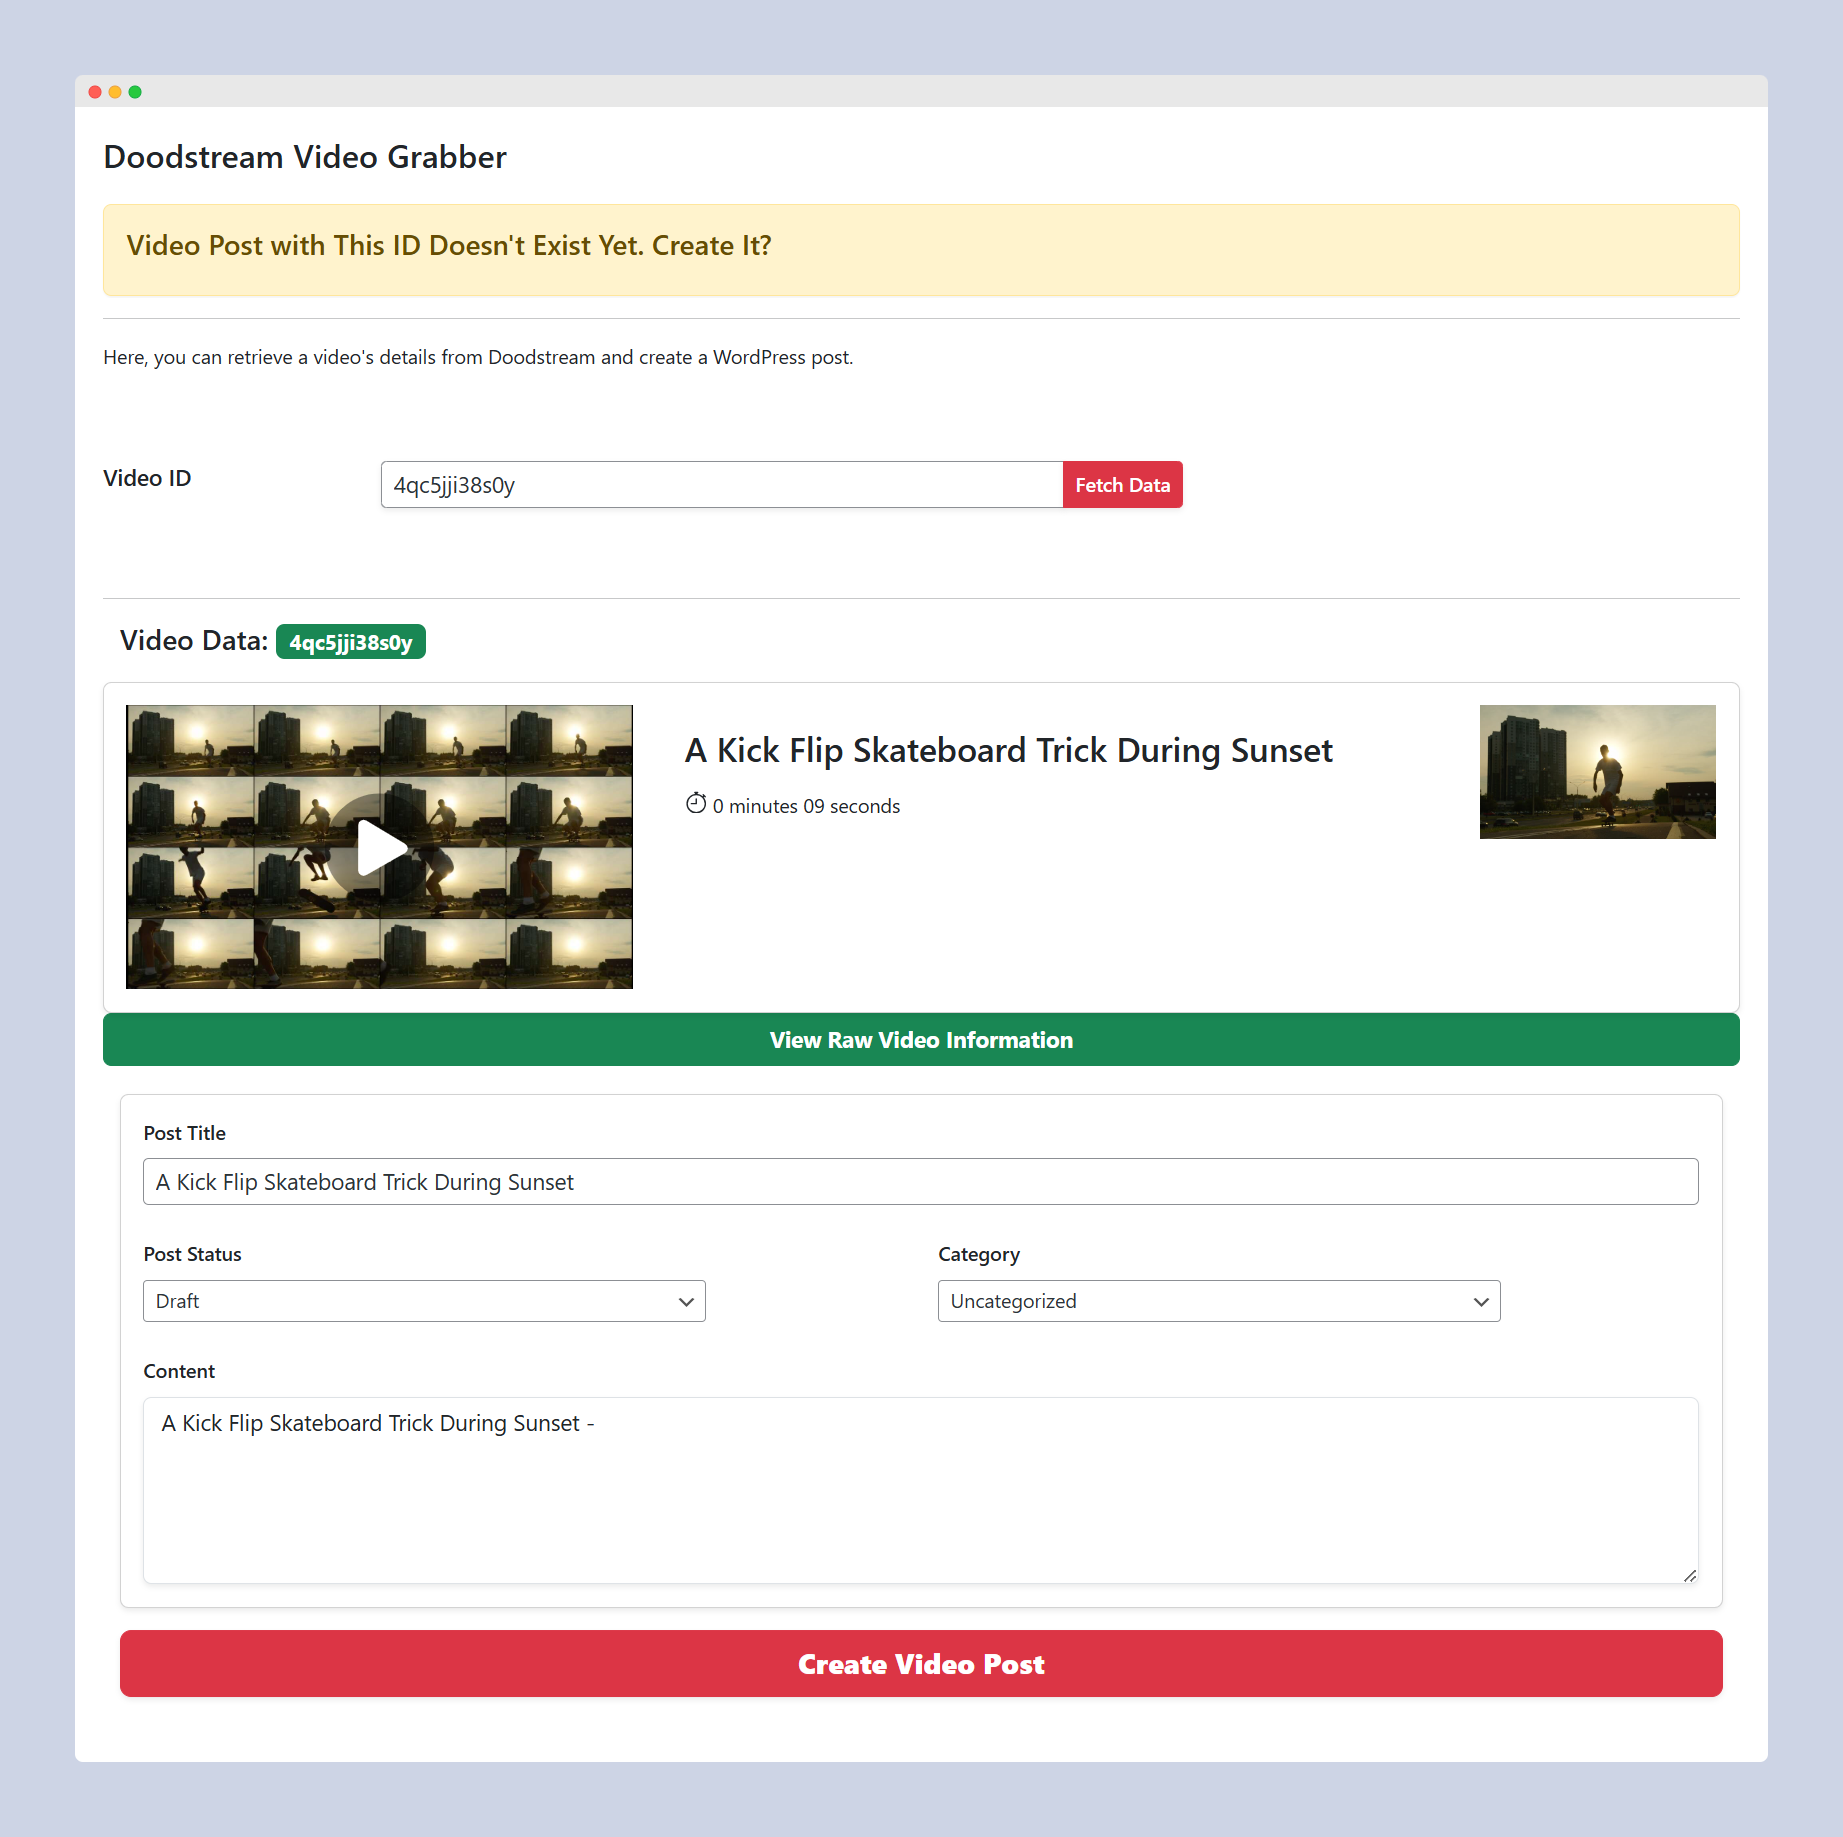
Leveraging the power of WPDoods, you can automatically create WordPress posts from your Doodstream videos by simply utilizing the video ID or URL.
This integration allows you to manage your video content seamlessly, without the need to manually create posts for each of your Doodstream videos.
Upon fetching a video information, you can also see the raw video information like this:
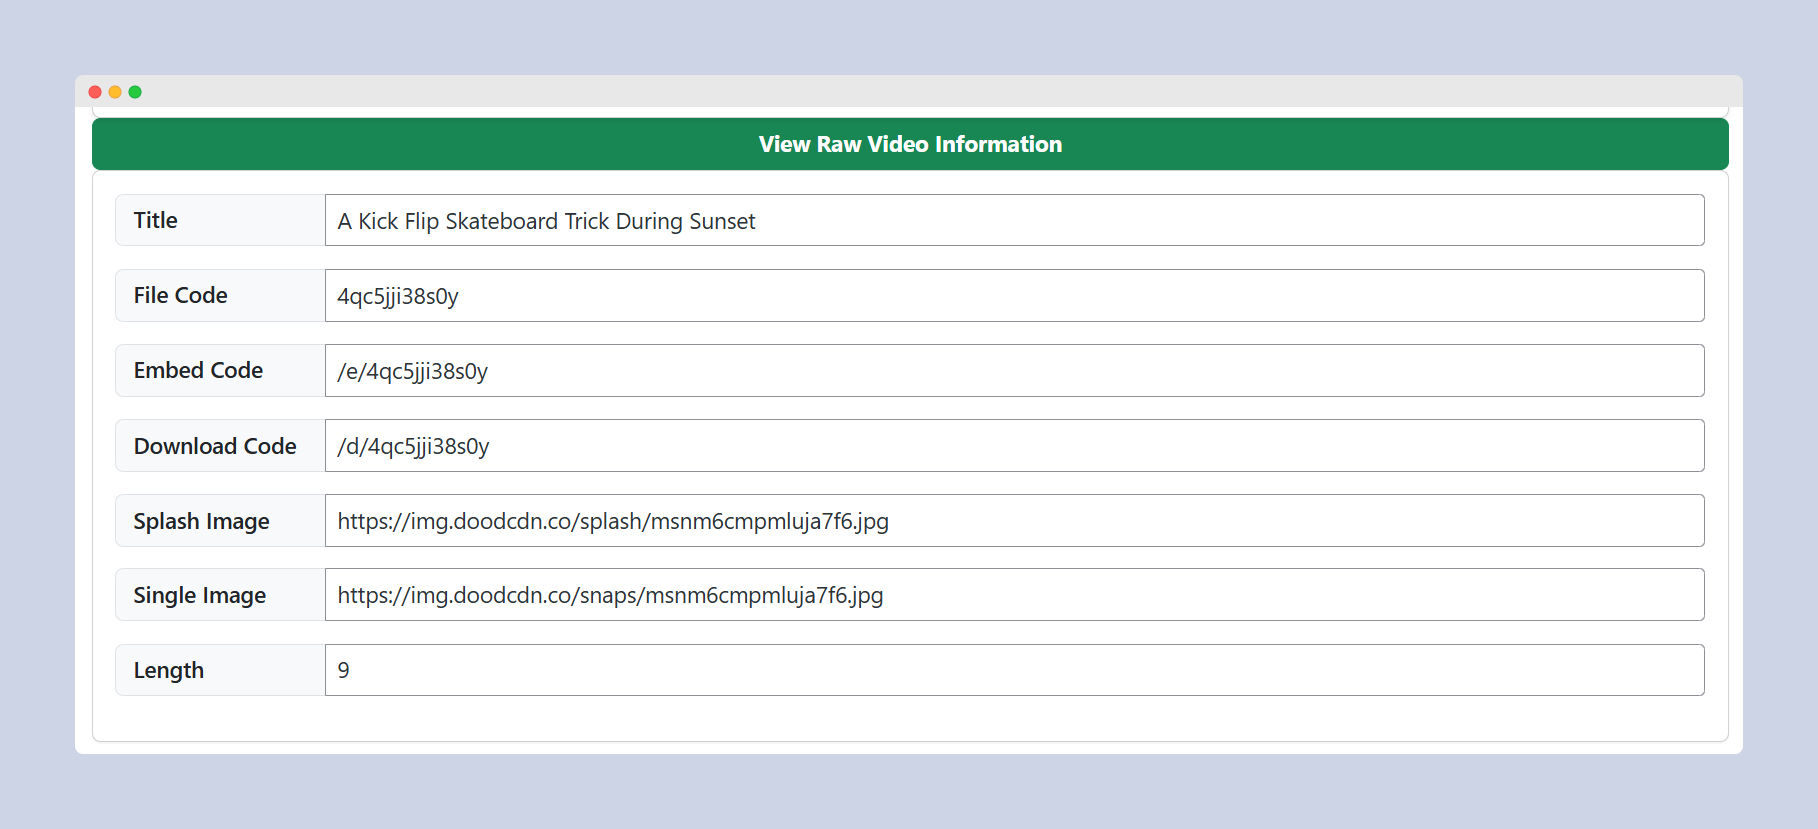
To create posts automatically from Doodstream videos, follow these steps:
- Fetch the video data from Doodstream using the video ID or URL.
- Utilize the fetched data to create a WordPress post.
- WPDoods will automatically setup the post title, content, permalink, and featured image based on the video information.
- Select the appropriate category and setup the post status as Publish or Draft.
- Review and publish the post.
For more information regarding this step, you might want to read our documentation below:
Create Video Post
By integrating WordPress with Doodstream via WPDoods plugin, you will have the ability to fetch ... Read More
With just a few simple steps, you can create video posts in no time at all. It’s not just about creating posts; with WPDoods, you can also fetch your Doodstream account info, including your registered email address, storage status, and account balance.
Embed Doodstream Videos Using Dynamic Shortcode
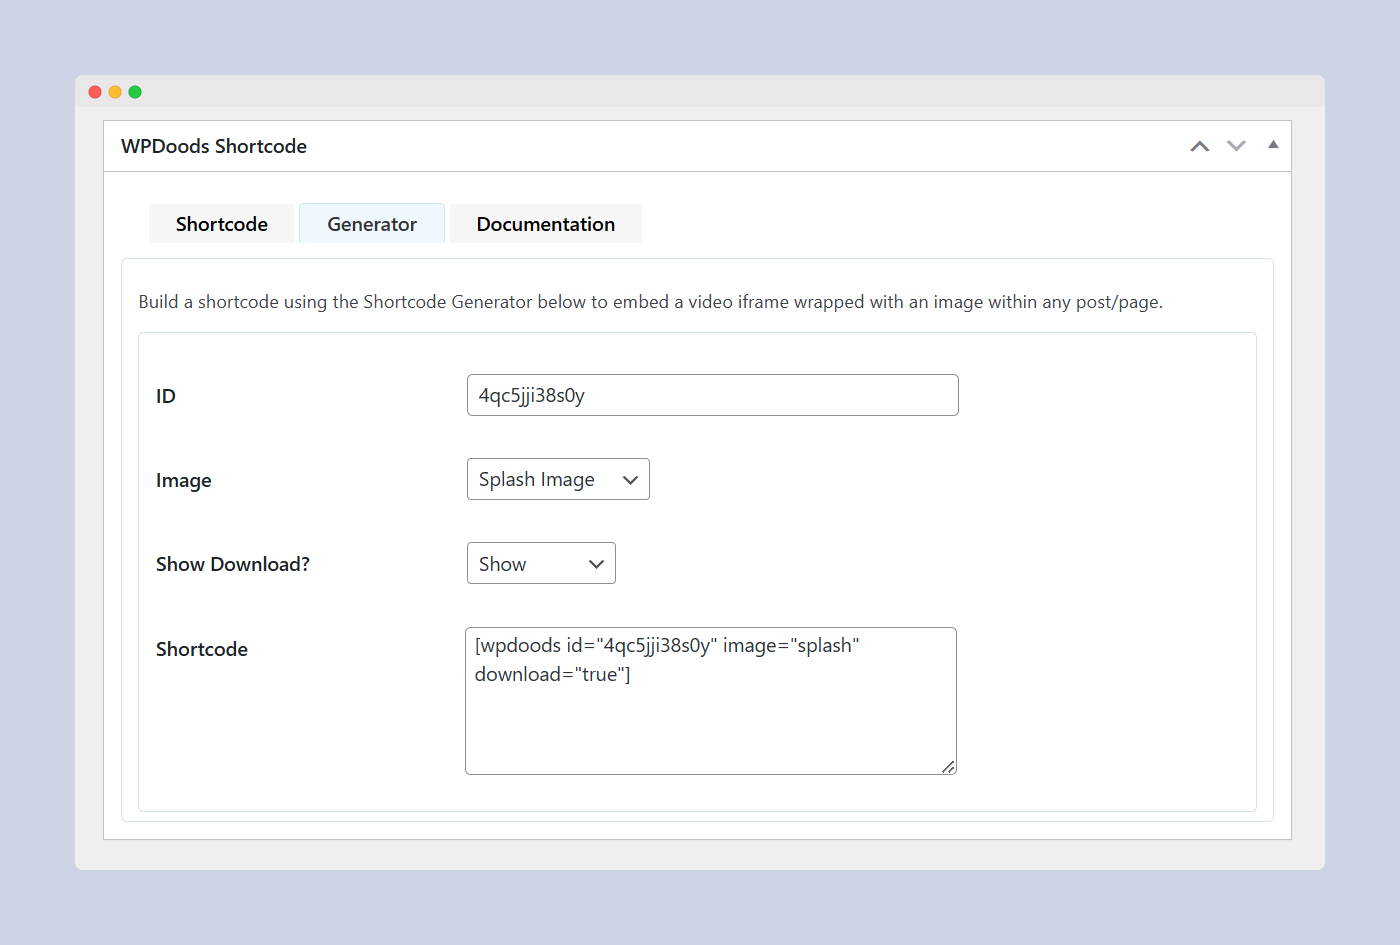
Additionally, you can use dynamic shortcodes to embed the fetched video into your WordPress post, ensuring a responsive viewing experience across all platforms, browsers, and devices.
Every vide post will have their own shortcode, but you can also customize it, or embed the video on different posts.
We also equip WPDoods with Shortcode Generator, which you can utilize to customize how you want to embed your video. For more information regarding WPDoods Shortcode, please read the following documentation:
Shortcode
You can display or embed a Doodstream video in a nice and responsive format in your video post ... Read More
Master this integration to streamline your video content management.
Using Remote Upload Features to Add Videos
Diving into the advanced features of WPDoods, you’ll find the remote upload feature which enables you to add videos directly to Doodstream from your WordPress dashboard.
This powerful tool offers a streamlined way to manage your video content without juggling between multiple platforms.
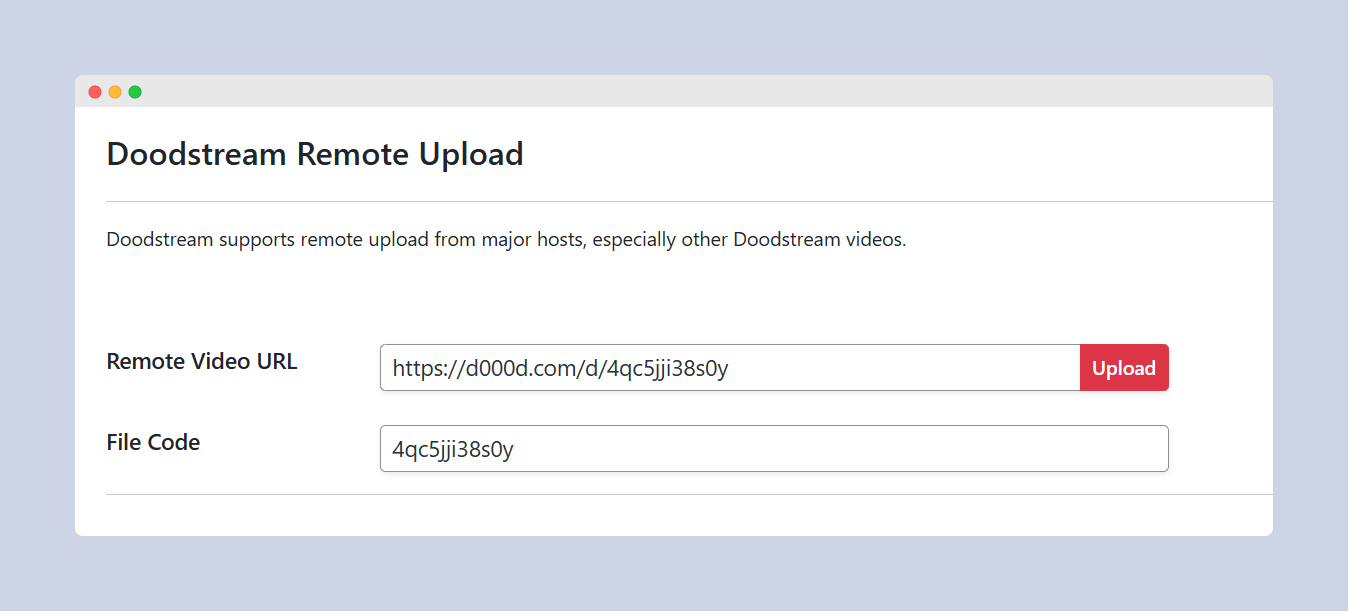
Here’s how you can utilize it:
- Insert the remote video URL into the Remote Video URL field then click the red Upload button
- Then, the video code will appear inside the File Code field which you can use to create video post using the Video ID
This feature is a game-changer for content creators, allowing seamless video management. It’s not just about uploading a video, it’s about integrating the entire video content process within your WordPress environment.
For more information regarding the Remote Upload feature, please read the following documentation:
Remote Upload
Doodstream has an amazing Remote Upload feature which you can use to directly upload remote video ... Read More
With WPDoods, you’re not just uploading videos, you’re crafting an efficient content strategy.
Advanced Features and Tips
Now that you’ve got the basics of WPDoods, let’s push the envelope with some of its advanced features.
Understanding how to manage your Doodstream account from WordPress can streamline your workflow, and knowing how to troubleshoot common issues can save you valuable time.
Managing Your Doodstream Account from WordPress
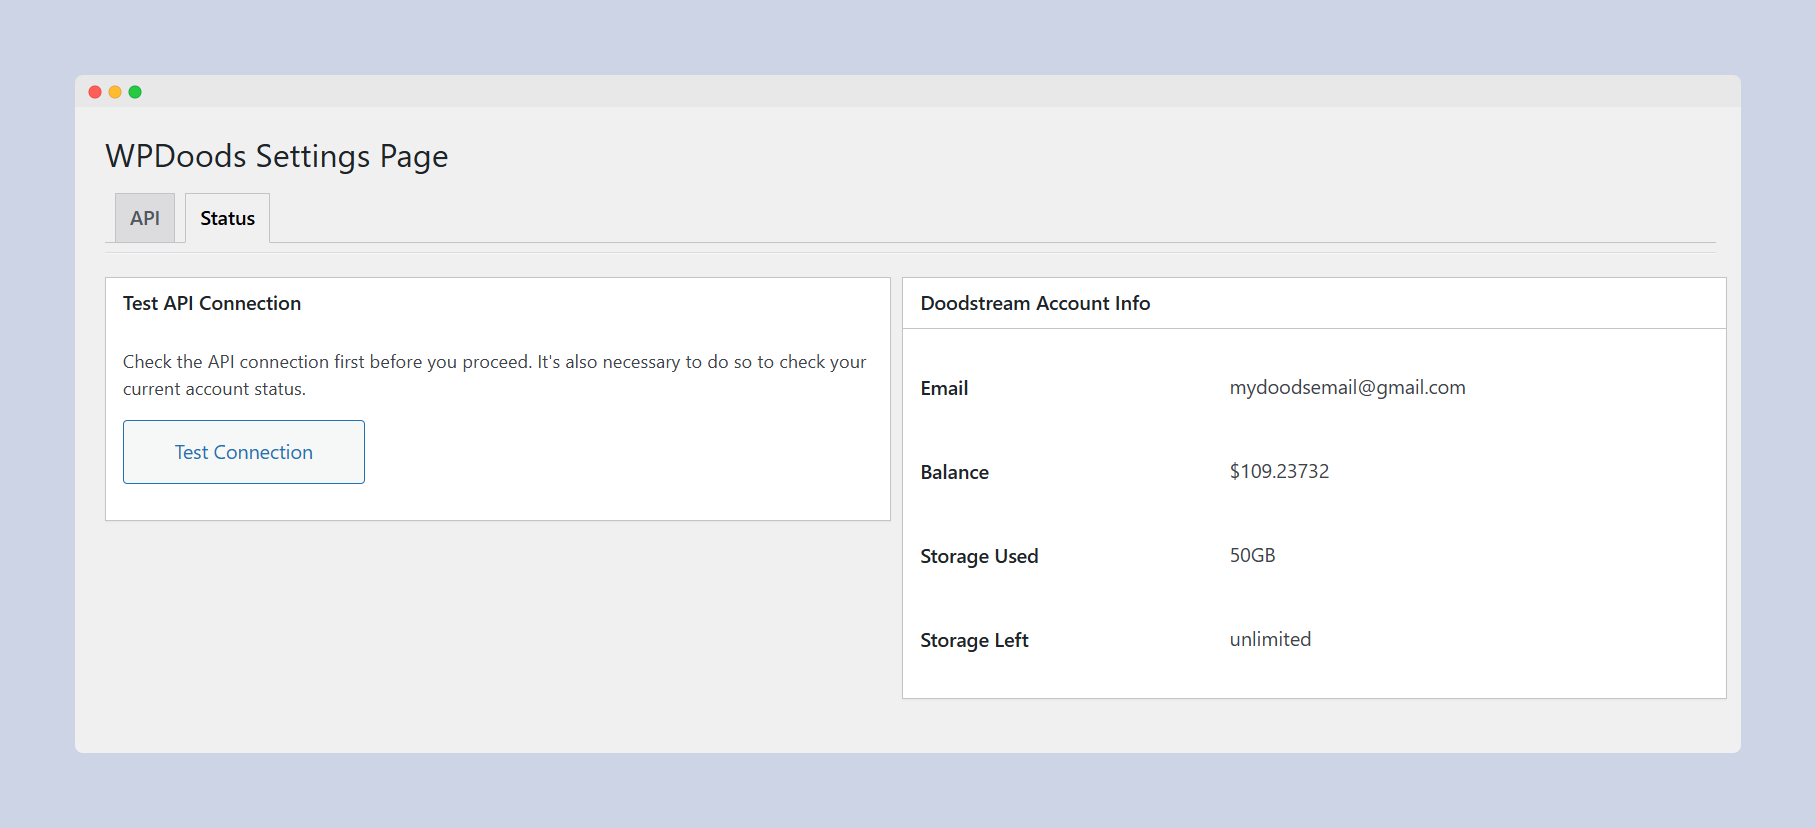
While integrating your Doodstream account with WordPress using WPDoods, you’ll also find a host of advanced features to manage your account directly from your WordPress dashboard, such as monitoring storage limits and viewing account status.
This gives you the convenience of managing your Doodstream account without having to leave your WordPress site.
Here are some of the key features that WPDoods offers:
- You can view your account’s storage status. This includes both used and remaining storage, allowing you to keep track of your space usage.
- You can fetch your Doodstream account info such as your registered email address and account balance.
- You can remotely upload videos directly from your WordPress dashboard. Simply enter the remote video URL and WPDoods will handle the rest.
- You can fetch video data by using the video ID/URL and create a WordPress post based on it.
- You can use dynamic shortcodes to embed fetched videos into your WordPress posts, ensuring that they’re responsive across all platforms, browsers, and devices.
Master these features to maximize your use of WPDoods in managing your Doodstream account.
Troubleshooting Common Issues with WPDoods
You might encounter some hiccups as you navigate the advanced features of WPDoods, but don’t worry, we’ve got some solutions and tips to smooth out your experience. The most common issues are related to embedding videos and setting up post content.
If you’re having trouble embedding videos, double-check your shortcode syntax. A misplaced character can disrupt the embedding process. If you’re still encountering problems, verify your Doodstream video ID. Invalid or expired IDs can prevent successful embedding.
When setting up post content, make sure you’re using the correct Doodstream Official API. Incorrect usage can result in incomplete or incorrect data fetching. Always cross-check the fetched data with the original video information on Doodstream.
Remote upload issues usually stem from invalid remote video URLs. Ensure your URLs are correct and accessible. If you’re still having problems, there might be an issue with your Doodstream account’s storage status. Make sure you have enough storage left.
Lastly, if you can’t fetch your Doodstream account info, recheck your account credentials and make sure they’re correctly entered in WPDoods. By troubleshooting these common issues, you can fully exploit the advanced features of WPDoods and master your WordPress-Doodstream integration.
Conclusion: Maximizing Your Video Content Strategy with WPDoods
Harnessing the capabilities of WPDoods can greatly enhance your WordPress site‘s video content strategy, offering an efficient way to manage and distribute your Doodstream videos. This powerful, versatile plugin is the key to accessing an advanced video content strategy that will drive engagement and growth.
Here are just a few of the ways WPDoods can transform your content strategy:
- Quick and easy integration: WPDoods seamlessly connects your WordPress site with Doodstream, simplifying video management and distribution.
- Efficient content creation: With WPDoods, you can generate a WordPress post using Doodstream video data, including title, content, permalink, and featured image.
- Remote upload capabilities: Upload videos directly from your WP Dashboard to your Doodstream account, streamlining your content workflow.
- Access to key account information: Fetch important data like your registered email address, storage status, and account balance.
- Dynamic shortcode embedding: Embed responsive Doodstream videos into your WordPress posts for a seamless user experience.
In wrapping up, leveraging WPDoods to integrate WordPress and Doodstream makes managing your video content a breeze.
With it, you can upload, fetch, and embed videos with ease and precision. The dynamic shortcodes guarantee responsive videos across all platforms.
Remember, this tool is all about enhancing your efficiency and control over your video content strategy. So, embrace WPDoods and experience a seamless, more productive content creation journey.